Starter & DIY Kits | Get the Job Done
Distributors for Selected Sealboss ® Products
– Dependable Depot, Inc.
– Instant P.O.
For Professional Use
Shipping to USA & Canada
Commercial & Residential Applications
Solutions for
Basement Waterproofing, Basement Leaks, Basement Wall Cracks, Foundations Cracks, Garage Floor Cracks, Driveway Cracks, Sinking Concrete Slabs, Pool Cracks & Leaks and much more
Table of Contents
DIY Water Stop Leak Sealing Injection Kit
Water Stop
Leak Sealing
Crack Repair Kit
Crack Injection
Curtain Injection
Small Job Leak Stopper Kit and Crack Repair Kit. Stop small active water leaks. For the ‘Handy Homeowner’ & Contractor. Residential and light commercial use. Used by Popular Mechanics.
“We were amazed at the simplicity of the process and the good results it produced–we haven’t seen any further leaks through the foundation since the two men completed their work.” — Popular Mechanics, Roy Berendsohn, Published: Jan 24, 2024
NSF/ANSI 61 Drinking Water Contact Approved
Smaller Crack Sealing Jobs, Basement Seepage, Leaking Foundations & Retaining Walls, Pool Leak Repairs.
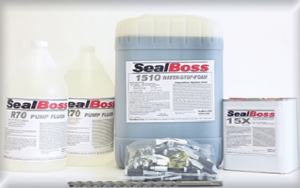
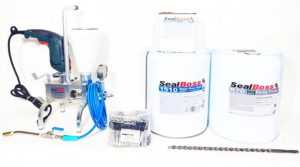
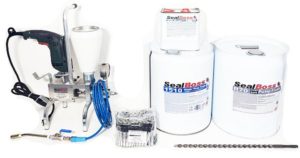
This Commercial Grade Do It Yourself Kit includes:
- 1 gal 1510 Water-Stop-Foam
- 0.1 gal 15x Accelerator
- 20 Injectors (Professional Grade Packers)
- 1 Hand Injection Gun Modified For PU Injection
- 1 Injection System Manual, Product Information
- 1 Pair Gloves
The Power of Injection
Popular Mechanics – Pop Mech Pro, Publishes Article with Detailed Pictures about using SealBoss Crack Repair Method with Specialized Leak-Sealant and Injection Packers from SealBoss:
SealBoss 1510 Water Stop Foam DIY KIT solution for fixing concrete cracks. The solution presented in this article and involves a straightforward repair method demonstrated by the contractor, using ordinary tools and SealBoss 1510 specialized leak-sealant from SealBoss. The process includes drilling holes along the crack, inserting injection ports, and injecting an expanding liquid polyurethane resin mixed with an accelerator to seal the crack effectively.
This method has proven successful in preventing further leaks through the foundation of the century-old building occupied by Popular Mechanics in Easton, Pennsylvania, showcasing its effectiveness in concrete crack repair.
Link to the article — “How to Fix Foundation Cracks”
— Popular Mechanics, Pop Mech Pro, 1/24/2024, by Roy Berendsohn
Testimonial
Small Job Water Stop Kit – Injection PU Foam
“Just wanted to say how glad I was to have your product on Monday. I live in Cobb County, GA and the water came pouring in during our recent flooding. I had already actually patched one of my two retaining wall cracks and already had the holes drilled for the second. However, I had not pumped the second one, so I got a desperate call from my wife for help when the rain hit that critical point and water stacks up against the front of our house. I got there from work as quickly as I could and still had to tighten the packers and mix the resin, but I had the water stopped inside of 15 minutes and we got nothing wet except for a few towels! What a lifesaver! There are a couple of areas that I just could not get the foam into so I am going to have to drill a few holes to make certain everything is sealed. I will need to order a few more more packers for that. I have bragged to many guys here at work about the DIY system and several have asked for your info for themselves or others, so I have passed your website along to quite a few already!
Thanks Again, Michael”
SealBoss Water Stop Kit Customer
Purchased your water stop crack repair kit [SealBoss DIY Water Stop 1510] from Dependable Depot for concrete work in my own basement. Product worked fantastic. No other specialty concrete repair companies in my area to my knowledge. I enjoyed working with your product and am looking to do some basement repair for side work. I am currently employed with a roofing, siding, and light construction contractor. Looking for forward to receiving more information.
Thanks, Mike, Wyoming
Testimonial
I would like to thank you for the quick call, in response to my inquiry into SealBoss Water Stop Foam. I received my order Tuesday, read through all of the materials, and began prep work on the crack in my pool. Today I was able to inject the material through the packers without any real problem. I had worked with urethane foams in the past, so I had some expectation as to what was going to happen, but was amazed as to how this stuff reacts. It’s been about 4 hours now, and the foam that came out of the cracks is nice and dense and looks pretty darn tough. (I hope and pray it’s the same on the inside.) Since our temperatures are ranging from 40 at night and high 60’s during the day, I’m going to let it cure overnight, and will be putting the tile back on the pool tomorrow. I have confidence that this will stop my leak problem so I can start worrying about something else. (You probably know what I mean if you own property) Again, thank you very much for the time you spent with me on the phone and helping me decide the quantity of material I would need. You are to be commended for your service!
Sincerely, Edgar Schubert, Woodsboro, Texas
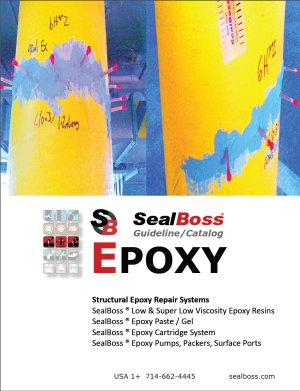
DIY Epoxy Crack Injection Repair Kit
Resins, Gel Adhesive
Bonding Agents
High Strength Epoxy
Crack Repair Kit
Proven And Tested Kit
Structural Epoxy Crack Injection Repairs, in Walls, Foundations, Pools and more
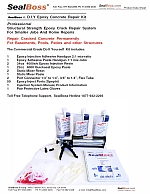
The Commercial Grade Do It Yourself Crack Repair Kit includes:
- 1 Epoxy Injection Adhesive Handgun 2:1 mix-ratio
- 1 Epoxy Adhesive Paste Handgun 1:1 mix-ratio
- 3 14oz 4040 LV Epoxy Injection Resin
- 1 22oz 4000F Quickseal Epoxy Paste
- 3 Static Mixer Resin
- 1 Static Mixer Paste
- 2 Port Connector 1/4″ to 1/4″, 3/8″ to 1/4″, Flex Tube
- 50 Epoxy Inject Ports (SpEpTri)
- 1 Injection System Manual, Product Information
- 1 Pair Gloves
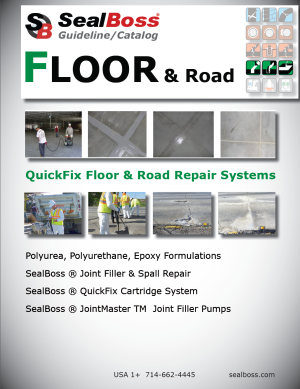
Small Job Floor Crack Repair Kit
SEALBOSS 6060 10 Minute Crack Mender
To fix cracks in floors
For warehouses and high traffic areas
Latest Polyurea Technology For Quick Floor Crack Repairs
For Smaller Jobs And Home Repairs
Fast cure repairs with the latest Polyurea & Polyurethane Technology. Concrete Floor Crack Repair for Warehouses, Garages and other structures with concrete floors. Used to prep for concrete polishing.
You mix and match product depending on your needs,
for a total of 5 cartridges and mixers from the following products.
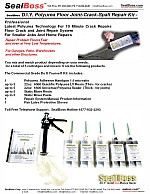
The Commercial Grade Do It Yourself Kit includes:
- 1 Polyurea Adhesive Handgun 1:1 mix-ratio
- 22oz 6060 Quickfix Polyurea LV Resin (Thin – for cracks)
- 5 Static Mixer Resin
- 5 Static Mixer Paste
- 1 Repair System Manual, Product Information
- 1 Pair Gloves
Small Job Floor Joint Repair Kit
SEALBOSS 6500 Fast Repair Polyurea
To seal concrete joints and fix cracks
For warehouses and high traffic areas
Crack Repair Kit
Latest Polyurea Technology For Quick Joint Repairs
Crack Repair Kit or Smaller Jobs And Home Repairs
Fast cure repairs with the latest Polyurea & Polyurethane Technology. Concrete Floor Joint Fillers for Warehouses, Garages and other structures with concrete floors.
The Commercial Grade Do It Yourself Kit includes:
- 1 Polyurea Adhesive Handgun 1:1 mix-ratio
- 5 – 22oz 6500 Quickfix Polyurea LV Resin (Thick – for joints)
- 5 Static Mixer Resin
- 5 Static Mixer Paste
- 1 Repair System Manual, Product Information
- 1 Pair Gloves
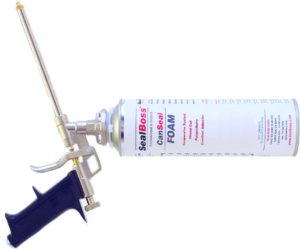
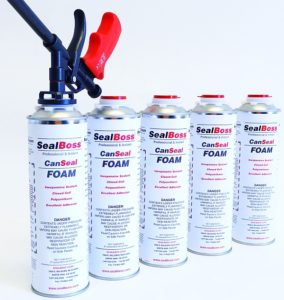
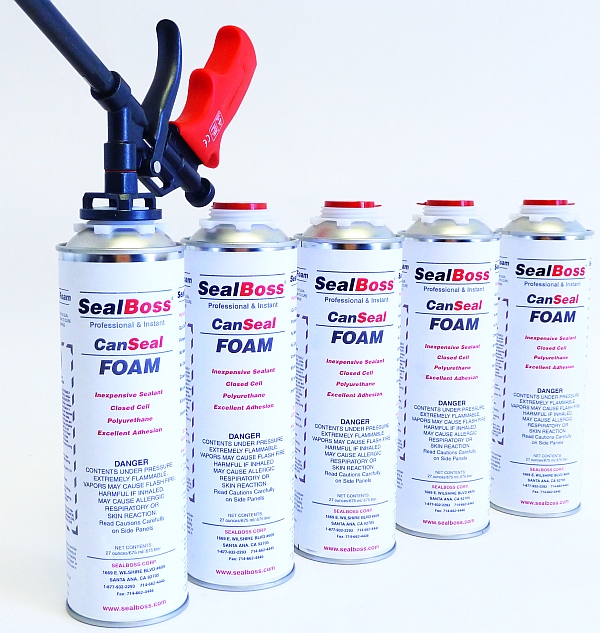
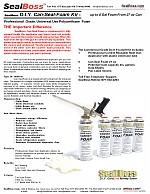
Highest Quality Professional Grade Polyurethane Foam
With our foam and the professional applicator gun you can fill voids precisely as intended. The foam does not ‘mushroom’ uncontrollably but expands to a defined volume. Contractors use our foam for many applications such as water-stop purposes in voids and cable runs on wind farms, as an insulation and seal-foam in general construction and as an instant ‘Backer Rod Bead’ in applications where joints need a back fill prior to applying the final sealant. Once you use it, you don’t want to go back to inferior over the counter foam cans.
Applications:
- Cable Runs, Instant Backer Rod
- Seals electrical conduits
- Utility Boxes, etc.
- Seals around pipes/ducts
- Increases energy efficiency
- Reduces noise
- Controls radon
- Seals out insects
- Confines fibers
- Strengthens tub bases
- And much, much more…
Product ships UPS Ground or UPS Standard (Canada) only
Many homeowners with poured-in-place concrete foundations will find cracks in their basement walls on closer inspection . Cracks are created by drying shrinkage, thermal movement, and other causes. If minor, they will cause no immediate problems. But over time, minor cracks often grow larger and cause major headaches, including reduced structural integrity or water leakage.
By sealing smaller cracks himself, the homeowner can save hundreds and even thousands of dollars. Even if a crack is not leaking now, eventually water might find a way through it. We supply commercial grade epoxies and polyurethane foams for all types of foundation crack repairs.
Crack injection has been performed for many years. In many cases, crack injection will fix the problem. The injection procedure will permit to fill the crack in full, from front to back, with epoxy or polyurethane. Injection has shown to be effective for filling cracks from 0.001 to 2 inches wide. It can also be used to fill cracks in concrete floors and ceilings.
In most cases homeowners can fix these cracks permanently without costly, disruptive excavation—using pressure injection of epoxy or polyurethane foam repair materials.
Polyurethane and epoxy injection are two important systems used by thousands of applicators world wide. Basic product knowledge helps users and specifiers to reduce possible problems. The right injection technology should be identified before the project is started. This brief overview is designed as a basic guideline for your decision making. We encourage you to call with any questions you might have. Our technical staff will gladly assist you with your projects.
Polyurethane Injection Grouting with Mechanical Packers
General Furnish all labor, equipment, and materials necessary and incidental thereto to perform all required operations to eliminate the flow of water by pressure injection to fill cracks, voids, and joints in concrete substrates.
Definition of Terms Refusal: When a crack or void area will accept no more grout under the prevailing pumping conditions (for reasons other than the pumpability of the grout) Return time the time taken for a grout, under certain application conditions to completely penetrate a crack, void, or network of cracks.
Gel time: The time required for the grout to cure following the reaction with the accelerator. Gel time or cure time can be affected by temperature and amount (percentage) of accelerator mixed in the component
A. INJECTION PROCESS:
Fully examine the existing site conditions to ensure that all associated work can be performed without removing or relocating existing utilities, structures or structural members.
1) Remove all standing water.
2) Drill at a 45° degree angle where possible to intersect the wall/floor joint interface halfway through the thickness of the substrate (e.g. 4” deep for 8” thick slab) Drill straight into the crack for concrete thickness below 4 inches.
3) Drilling depth should be half the thickness of the concrete member.
4) Install mechanical injection ports and secure in place at a spacing of 6-12” inches apart (6” for hairline and 12” for wider cracks). Alternate positioning from left side to right side as you move along the crack where possible. Extremely wide cracks (if any exist) should be covered with a surface seal prior to injection in order to contain the injection resin until cured.
Under proper pumping conditions in active leak injection, the following signs should be observed in the order listed:
(a) Water displaced from crack/joint by the resin
(b) Water and resin mix (foamy) appearing at the crack/joint area
(c) Pure resin from crack/joint If the joint surface exhibits immediate free flow of resin while working the first packer, pause for a few minutes. In most cases the resin will react fast enough with the water and expand rapidly. The resulting resin product will heal the joint and provide a surface seal to contain the material to follow.
The contractor is responsible for estimating what duration time is adequate for grouting the voids and is responsible to prove that the void is full by attempting to inject each port to refusal. Once the contractor is assured that the resin has reached the next injection packer or has sufficiently stopped the water as evidenced by the grout oozing out of the joint area, he should shut off the resin flow and disconnect pump pressure line and proceed to the next packer. Follow the injection process for one to three packers, the contractor shall return to the first packer and attempt to re-inject it again. Some of the packers will take more grout, filling up more of the crack/joint area and creating a higher density void filler and water stop. The contractor shall continue this procedure until refusal.
MATERIALS
A. Injection Ports
Provide suitable injection ports (stainless steel/brass/zinc/plastic), buttonhead or zerk fittings, shaft and rubberized expandable grommet.
B. Grout Injection Material
Hydrophobic water cut-off grout based on MDI (methylene-diphenyl-isocyanate) polyurethane. (e.g. SealBoss 1510, 1570) Grout material is to be 100% solvent free and 100% solids. Gel time of the product is adjustable by adding a certain percentage of accelerator per the manufacturer’s recommendations. Grout material shall not shrink or swell. Grout material shall cure to a semi-flexible foam structure which is not affected by water or dryness. Grout material shall have the capacity to expand upon contact with water to a volume of 30 to 40 times. The composition of the material is one that water is not a component of the cured foam structure.
C. Pump Equipment
All chemical grouting equipment shall be of a type, capacity, and mechanical condition suitable for doing the work. The equipment shall be compatible with the chemicals to be handled and shall be maintained in proper operating conditions at all times.
Environmental Requirements
1) Do not apply if the temperature is below 45F or above 95F unless the material manufacturer is consulted for recommendations. Product should always be conditioned to room temperature Owner’s Requirements
2) Execute all work in accordance with all safety requirements, approved written procedures and with the least amount of interference with the work of other trades as possible.
3) Equipment should be confined to the delivery area and all components shall be in good working order as approved manufacturer for use with the specified materials.
4) Immediately notify the Site Engineer/Owner’s representative in the event of any process interruption or environmental concerns which could affect the service or application conditions relative to this work.
Protection, Cleaning and Safety
1) Following a complete injection of all mechanical packers to refusal and where the visible leakage has been completely eradicated, remove all injection packers. Remove cured material where applicable and fill injection hole with rapid cement.
2) Clean all adjacent areas of excess material, powder, cement and/or droppings. Chemicals used for cleaning shall be non hazardous and non flammable such as the SealBoss R70 pump flush
3) Process grout materials using appropriate protective gear including gloves, masks, or goggles, and appropriate clothing as described and in accordance with the manufacturer’s SDS sheets
1) Follow manufacturer’s recommendations for product safety and disposal of material.
2) Comply with all OSHA regulations for drilling procedures using protective gear including gloves, highlighted vests, face shields, or goggles. Always provide for ample ventilation!
Epoxy Injection with Surface Ports (Cartridge System)
Do not apply if the temperature is below 48F or above 95F unless the material manufacturer is consulted for recommendations. Product should always be conditioned to room temperature. Cartridges need te be shaken to mix material prior to use.
STEP 1
For better penetration drill a 1/4 hole into crack or use a blade to vee out the width of crack at the area where the surface port is to be installed.
STEP 2
Clean the crack and wall with a wire brush to remove debris and loose concrete.
STEP 3
Dry damp spots on the wall with a heat gun or hair dryer.
STEP 4
Using a small amount of epoxy paste, secure ports over the crack at 4-6 inch intervals.
STEP 5
After the ports set, spread epoxy paste 1/8 thick over the crack. Around ports, apply the epoxy paste slightly thicker. Wait until paste becomes tacking before injecting resin.
STEP 6
Remove the shipping disc, retainer nut and plugs from the cartridges. Attach static mixer with the retainer nut or screw on directly if applicable.
STEP 7
Using the 2:1 dispenser gun, starting at bottom, inject the liquid epoxy resin until it runs out of the port above. Then cap off the port you are injecting and move up the wall.
STEP 8
Wait about a day before removing ports. The time it takes epoxy resin to cure depends on the temperature. At 77 Degrees, the gel time of epoxy is approximately 80 minutes. The colder the temperature the longer it will take to cure.
Do not apply if the temperature is below -10F or above 95F unless the material manufacturer is consulted for recommendations.
Cartridges need te be shaken to mix material prior to use.
Polyurea, unlike epoxy, will cure at much lower temperatures. The cure time will be delayed.
The thinner products such as SealBoss 6060 may be mixed with sand to create a pliable mortar.
STEP 1 Discard a small ampount of material as it exits the static mixer into a cup to assure uniform color in the mixer indicating correct mix ratio.
STEP 2 Crack or joint surface must be dry. If in doubt apply small amount of material first as a primer. This will help to bind any existing moisture and create a barrier for the final fill. Apply material uniformly into crack or joint. If you plan to shave the excess material overfill slightly.
STEP 3 to reuse cartridge, unscrew static mixer and discard a small amount of material into a cup to avoid cross-contamination. Re-install plugs and nut to secure the reainder of the product.
STEP 4 After the product has cured, the joint/crack may be shaved with a shaving tool to create a flush and appealing surface.
Injection Methods with Polyurethane Grouts and Epoxy Resin
Introduction I “Characteristics and Properties”
1. Polyurethane Resins
1.1 Water Leakage Through Cracks in Concrete
1.2 Cold Joints, Expansion Joints, Working Cracks
1.3 Advantages of the 1510/1570 Water-Stop foam grouts and 1400Line LV-Resin Polyurethane System
1.4 Hydrophilic Gel Injection
2 . Epoxy Resins
2.1 Injection to Achieve Structural Strength
2.2 Advantages of the 4000/4040/4050 Epoxy Injection Systems
II Injection Equipment
1 Pumps
2 Surface Ports and Mechanical Packers Remark
III Procedures
1 General Information
2 Water Stop Injection Methods
2.1 Sealing Cracks and Joints
3 Sealing Expansion Joints and Wide Cracks
IV Safety
Concrete often cracks. It is universally recognized and experienced. Concrete construction requires construction joints and cold joints. All of these wanted and unwanted openings in concrete structures may cause very serious problems. One of them is water leakage. Freeze/thaw damage and corrosion of rebars resulting in structural weakness and even failure can all be attributed to cracks and water infiltration.
Now most of these problems can be economically resolved utilizing the SealBoss Pressure Injection System. It has been proven to accomplish two major purposes: one is to stop water leakage permanently, and the other is to maintain or even restore design strength. Slabs on grade, construction or control joints, parking garages, manholes, tanks, dams, and many other structures can now be fixed permanently.
SealBoss ® Injection Tube System
A preventive measure that is superior over other cold joint sealing method is the SealBoss Inject Tube System 2000. The injectable tube is designed to control water problems in new construction from the beginning. The poured in place system can be injected when necessary. Our Injection System is extremely versatile by supplying supreme materials and equipment for the two most advanced procedures in concrete repair.
SealBoss ® SwellCaulk
SealBoss ® SwellCaulk is a single component, hydrophilic, water activated, hydro active, expandable, gungrade waterstop.
The product is formulated for sealing construction joints, pipe penetrations and other concrete joints of smooth and uneven surfaces. Material cures and swells in the presence of moisture or water thereby creating a compression seal. Curing time decreases with higher temperatures and greater relative humidity. SealBoss ® SwellCaulk will cure in approximately 24 to 36 hours depending on ambient climate. The prodcuct is supplied in sausages or in cartridges. The product is for professional use.
The SealBoss ® SwellCaulk Waterproofing Principle
When in contact with water, SealBoss ® SwellCaulk Sealants develop an expansive swelling pressure. The pressure between the expanding SwellCaulk and the surrounding concrete structure prevents the penetration of water through the joint and provides a durable waterproofing solution.
Injection Methods with Polyurethane Grouts and Epoxy Resins
POLYURETHANE RESINS
1.1 WATER LEAKAGE THROUGH CRACKS IN CONCRETE
Epoxy injection resins usually fail in stopping active water leakage because of their slow reaction time and inability to bond to wet surfaces; this failure is resolved with the SealBoss Corp. supplied Polyurethane System. The actively flowing water will be stopped by injecting 1510/1570 which reacts quickly with the water to form an expanding foam. The final product is a semi rigid or flexible closed-cell and strong bonding seal. To control the speed of the chemical reaction a certain percentage of a accelerator is added. The amount of accelerator added allows to control gel times between a few seconds and several minutes.
>1.2 COLD JOINTS, EXPANSION JOINTS, WORKING CRACKS
In spite of all the best efforts of engineers, architects and contractors, structures develop cracks in unanticipated places. When the structure settles and any movement finally stops, the crack becomes stable. Most cracks, however, continue to move due to several influences such as thermal or stress induced forces and soil moisture changes. Crack movement usually occurs in cycles. Cracks contract and expand periodically over time, which may be as long as a year or as short as several hours. Since most structures experience periodic movement, rigid crack repair materials often fail or cause other cracks in areas nearby. Therefore, even if water infiltration was successfully stopped initially, the ongoing movement of the structure might cause a new failure.
SealBoss 1510/1570 Water-Stop and the 1400 Line LV-Resin Line have been designed for leakage repair in problem areas such as expanding and contracting cracks, expansion joints and cold joints. Polyurethane resins form a flexible gasket in the defective concrete, thus stopping the leak and tolerating movement of the structure.Very fine cracks may require very low viscosity non-foaming polyurethanes such as SealBoss 1430.
1.3 ADVANTAGES OF 1510 Water-Stop / 1570 Flexible Water-Stop AND 1400 Line LV-Resin POLYURETHANE SYSTEMS
– Negative side application possible
– Deep penetration into very small cracks
– Foam increases in volume to fill cavities and voids
– Adjustable gel times
– Excellent bond to wet surfaces
– Underwater injection approved
– Good elastic strength, tolerant of movement
– Inert after curing, constant volume, no shrinkage
– Tolerates unavoidable debris
– Approved for contact with potable water
– Easy to handle
– Tolerant to mixing variations and field conditions
– Materials within the system are compatible
– Does not create new cracks
1.4 HYDROPHILIC GEL INJECTION
Hydrophilic Gels, like SealBoss FlexGel2 , are an important alternative to the hydrophobic materials as described above and typically used in applications involved with soil. Flexgel is capable of incorporating water in amounts up to 20 times of it’s own volume by forming a flexible gel.
Smaller amounts of water result in a stronger gel and even less water between a 3:1 and a 1:1 ratio creates a foam. Hydrophilic polyurethanes are moisture sensitive after they are cured, and gel that is objected to a dry environment may experience some shrinkage due to evaporation of water. Gels may swell again later in a moist environment. Since postcure shrinkage can not be completely avoided in a dry situation, it is not recommended to use hydrophilic grout in crack injection when there is a chance that those cracks may dry out completely.
Flexgel 2 is designed to work behind the structure in combination with the surrounding soil. Since the material can be premixed with water by using a multi ratio pump, the mixed material is extremely low in viscosity and penetrates most soils rather well. The resin also fills the space between the structure and the soil thus creating a ‘curtain’ that functions as a waterproof membrane. This curtain injection can be done from the inside (negative side) by drilling through the structure in a pattern and injecting the resin from the inside out into the soil or the space between the structure and the soil.Applications are below grade structures such as parking garages, basements, manholes, dams, and so forth. For further information on gels please refer to our Flexgel data sheet.
The SealBoss Corp. staff will be happy to assist you in deciding which products to use based on your application and needs.
2. EPOXY RESINS
2.1 INJECTION TO ACHIEVE STRUCTURAL STRENGTH
Semi-flexible and flexible sealants are usually the best solution for crack and joint related problems. Nevertheless there are conditions where structural repair is necessary and specified. Structural strength is achieved by using 4040 and 4000 epoxy injection resins. Due to the unique properties of the epoxy injection resins, it is possible to inject this resin deeply into concrete joints, hairline cracks and fissures.
Epoxy resins by provide very high bond and compressive strength, and can restore cracked concrete to a complete monolithic piece. Depending on the job, injection can be done with low pressure and high pressure systems. Low pressure systems commonly utilize ‘glue on’ surface ports. High pressure injection is characterized by the use of mechanical packers.
The low pressure injection method is more popular in epoxy resin injection and usually achieves good results.
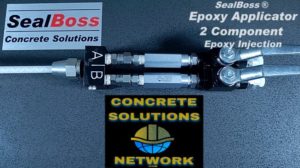
Although most epoxy injection can be performed with single component polyurethane injection equipment, it is recommended to use specialized epoxy injection gear to meet the specific material properties. Since the premixed epoxy reacts within a certain gel-time just by itself, it is advised to use two-component pumps with a static mix head to prevent premature reaction in the pumping system. While small batches of premixed material can be closely observed, it is essentially impossible to prevent mishaps and premature curing on the larger scale of a complex job. The two-component set up will give the contractor peace of mind and less aggravation when cleaning the system. The components are completely separated before mixing in the static mixer, therefore the pump and pressure hoses require less cleaning maintenance. The delivery lines from the mixer have to be flushed, and the mixer itself can be easily replaced if necessary.
2.2 ADVANTAGES OF THE 4040 LV, 4050 SLV -EPOXY INJECTION SYSTEM
– Negative side application possible
– Deep penetration into very small cracks
– Medium or short gel time
– Bond to moist surfaces
– Underwater injection approved
– High structural strength
– Inert after curing, constant volume, no shrinkage
– Tolerate unavoidable debris
– Approved for contact with potable water
– Easy to handle
– Tolerant to mixing variations and field conditions
II INJECTION EQUIPMENT INFORMATION
1 PUMPS
The right injection equipment is important to get the job done right. The equipment does not necessarily have to be elaborate or expensive, it just has to be adequate.
Epoxy injection should be done with specialized two-component pumping equipment. (Single component pumps may work for small jobs) In general, pressures between 200 and 600 psi are sufficient. If surface of the area to be injected is, in most cases, dry then surface ports are installed. Epoxies do not react with moisture in the crack and therefore do not thicken for a period of time. This is one of the reasons that lower injection pressures are generally acceptable.
High pressure injection and injection in wet areas can also be done utilizing “polyurethane injection methods”, holes are drilled and mechanicals packers are installed.
Polyurethane injection is usually done with single component equipment. Dual component pumps may be used if available. The two criteria for injection pumps are the injection pressure and the quantity of material it is capable of moving. We recommend a minimum of 1000 psi pressure. This may seem to be excessive, but our competitively-priced, hand-operated pumps already create 1500 psi with very little effort.
It is a myth that pressures of 300 psi are sufficient to do every job. In wide cracks and joints, pressures up to 300 psi may be enough to keep the material moving, however almost every hairline crack injection requires pressures of 1000 psi or more to produce satisfactory resin flow and adequate penetration.
Polyurethanes are generally water reactive. As soon as the product comes into contact with a certain amount of moisture it starts a chemical reaction which results in increased viscosity (thickness). Increasing material thickness and the presence of hydrostatic pressure are reasons for high injection pressures needed. The injection pressure has to be high enough to push the gelling product into the voids and fine fissures against the hydrostatic pressure and against the pressure created by the reacting material itself. Only high injection pressures can guaranty the success in many cases.
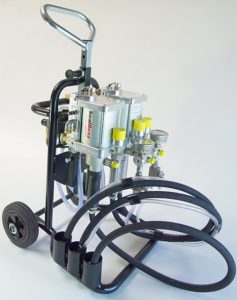
A solid hand pump and quality accessories seem to be a more economical and professional investment. An electric alternative to cartridge systems is the small and convenient P1001injection pump. Don’t be misled. While there are applications for cartridge injection, polyurethane foam injection in areas of hydrostatic pressure is not one of them. Future developments of cartridge systems may bring us a reliable system.
The maximum volume of material that a pump is capable of putting out, seems to be of lesser importance than the pressure. Most jobs can be done with very affordable equipment. High volume pumps may be advised for major tunnel and dam repair jobs where large quantities of high pressure water have to be stopped.
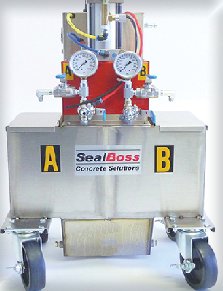
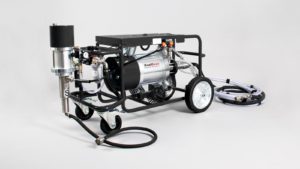
SealBoss Corp.. supplies single and dual component, electric and hand-operated injection pumps in various price ranges and a complete line of cartridge systems.
2 SURFACE PORTS & MECHANICAL PACKER INFORMATION
In order to inject the resin into the crack, it is necessary to install injection ports which are also called mechanical packers or just plain packers. While it is common to use “glue on” surface injection ports for low pressure epoxy injection in dry areas, it is recommended to use packers for polyurethane injection and high pressure epoxy injection.
Surface ports are usually glued to the surface with an epoxy gel such as 4500 QuickFix. The crack surface should be buttered using the same gel to contain the injected material (epoxy). Surface ports are common in epoxy injection and they are an important and economical alternative to packers in low pressure and dry epoxy injection. However there is a disadvantage: surface ports will not stick to wet surfaces and they do not tolerate injection pressures above several hundred psi.
Quite the opposite is true with mechanical packers. They are made for pressures up to 5000 psi even in wet structures.
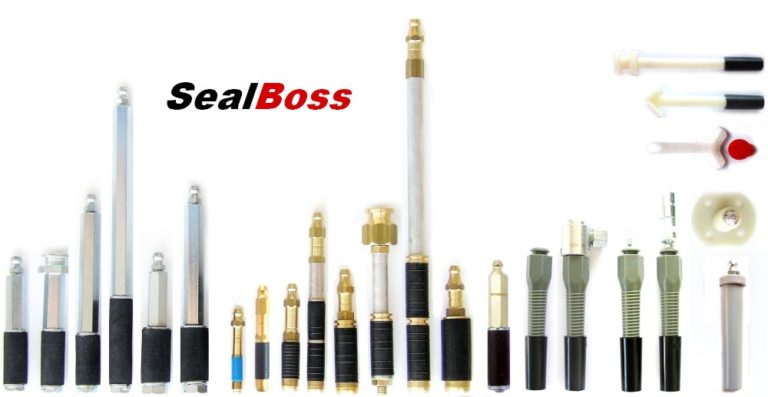
Good quality packers should be made of metal and an expandable rubber sleeve. A medium soft, slightly rough rubber provides the best grip and spalled concrete and blown out ports are very rarely experienced. Packers made of cheap plastic are inferior by design, and they are not recommended for the following reasons. The plastic sleeve does not allow a grip similar to the rubber sleeve and the conic screwlike shape of the port won’t create an equal force on the walls of the drilled hole. Even worse, since the conic shaped plastic packer does never really fit the drill hole, the pressure created by the installed packer will be located towards the opening, which results in concrete spalling and packer blow outs. The uneven grip of the conic plastic packers currently on the market cannot compete with the even grip of a true metal-rubber type port that evenly fits and expands towards the surrounding concrete. A snug and reliable fit of the packer is essential for the safety of the technician, and is an important factor for successful injection work.
The size of the packer selected depends on the volume to be pumped and the pressures to be applied. Most frequently used diameters are 3/8 inch, 1/2 inch and 5/8 inch. Smaller diameters need smaller holes which results in less intrusion into the integrity of the structure and therefore is recommended. The 1/2 inch packer seems to be the best compromise in strength and size. Ninety per cent of the jobs can be accomplished with a 1/2 diameter packer like the SealBoss specialty packer line.
SealBoss Corp. provides mechanical packers and surface ports in various styles and sizes for residential basements as well as dam and tunnel injection.
REMARK
Field conditions and installation techniques for injection chemicals vary widely, Contractors must determine the suitability of the product and methods of installation for their particular use. By experience we know that one type of material cannot do everything, and therefore the SealBoss Corp. product line consists of several products with unique characteristics to enable the contractor to accomplish the job.
III PROCEDURES INFORMATION
1. GENERAL INFORMATION
The SealBoss Pressure Injection System can be used for injecting cracks, cold joints, expansion joints and for soil stabilization. The system can be used to stop gushing water, to seal minor seepage, to regain structural integrity and to waterproof and strengthen almost any concrete or masonry structure from the positive or negative side, below grade, above grade and under water. This versatile system is used to solve problems in small residential objects as well as problems in major commercial structures.
The SealBoss system includes epoxy injection techniques as well as polyurethane injection techniques. Since the low pressure injection techniques that utilize ‘glue on’ surface ports are more commonly known, the following introduction focuses on the high pressure injection in conjunction with mechanical packers. Mechanical packers eliminate many problems of the surface ports including bond failure at pressures above 300 psi and inaccessibility in wet, and water pressured areas. High pressure injection through mechanical packers opens a new dimension of possibilities to solve joint and crack related problems.
SealBoss supplies resins and equipment for low and high pressure injection, surface port and mechanical packer injection methods and systems.There are some standard procedures that can be followed on most jobs. The following is a short introduction.
It is recommended to inject at a time when the cracks or joints are at the widest aspect of their moving cycle. The reason is that sealants perform better in compression than in tension. This is of great importance when extreme movement is expected.
Water tanks are a good example, since the crack movement is usually significant and in relation to the water level. Whenever possible, we recommend the injection of water tanks while filled rather than drained. While filled the cracks in a concrete tank are open, which allows good penetration of the injection resin. In addition to the good penetration, the material won’t experience any tension, since the cracks are already at the widest aspect of their moving cycle. Should the water level decrease, or the tank be drained completely, the sealant in the cracks will be in compression and a failure is very unlikely.
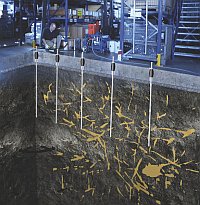
Besides crack injection it is also possible to inject polyurethane grout to the back side of a wall into the soil thus creating a grout curtain. This procedure is necessary when well defined cracks, joints or openings of any kind cannot be detected but moisture infiltration is evident.
Another option is injection of the void between the structure and an existing membrane that had initially been installed to prevent water leaks, but failed. Membrane failure is a common cause of below grade water leaks. To the dismay of any engineer, it often occurs on brand-new buildings.
The Pressure Injection System has been proven to be a superior system in correcting those failures with ease by injecting from the negative side. No digging is necessary. Voids in the structure can be sealed, defective membranes can be fixed and even water pockets behind the structure can be effectively filled to minimize hydrostatic pressure. The injected soil will be compacted and stabilized thus reducing water accumulation behind the structure and shifting of loose soil. Extensive soil injection can prevent land slides and therefore minimize stress on the foundation.
The number of practical methods that have been established over the years is endless. The SealBoss Pressure Injection System has been proven to be extremely versatile, reliable and economical in resolving water related and structural problems.
2. WATER STOP INJECTION METHODS INFORMATION
2.1 SEALING CRACKS AND JOINTSThe basic steps for the injection procedure are:
1. Clean surfaces
2. Drill injection holes
3. Insert injection packers
4. Flush crack, if necessary
5. Resin injection, 1510, 1570, 1400 Line LV-Resins
6. Cleanup
STEP 1 – CLEAN SURFACES
Cleaning of the surface helps the technician to identify the exact location and the width of the crack to be injected. Sometimes the concrete surface is hidden under a surface of mineral deposits left from long-term water leakage. Items that obscure the crack should be removed, because the crack must to be seen clearly in order to layout the drilling patterns for the injection holes.
STEP 2 – DRILLING INJECTION HOLES
In order to inject the resin into the crack, it is necessary to install injection ports, also called mechanical packers or just packers. While it is common to use surface injection ports for some low pressure epoxy injection in dry areas, it is recommended to use packers for polyurethane injection and high pressure epoxy injection. Surface ports will not stick to wet surfaces and they do not tolerate high injection pressures. Quite the opposite is true with mechanical packers. The metal-rubber type packers are made for pressures up to 5000 psi in wet and dry structures.
Before drilling the injection holes, locate rebar and conduit, and plan the pattern to minimize damaging the bit during drilling.
It is advisable to use a high quality rotary hammer. The diameter of the average injection hole shall be 1/2 inch (13 mm) or 5/8 inch (16 mm) depending on the packer used. SealBoss Corp. supplies packers in several diameters and lengths. The angle while drilling should be approximately 45 degrees or less to the surface and towards the crack. The depth of the drill hole intersecting the crack should be somewhere close to the middle of structure, if possible. Holes deeper than 18″ are usually not required even if the concrete being repaired is more than 36 inches thick, as long as adequate pumping pressure is available and material is contained during injection. Holes should always be staggered from one side of the crack to the other. This assures a higher percentage of holes intersecting the crack, even if the angle of the crack within the concrete is not perpendicular to the surface. No two cracks behave just alike. In some instances a crack will fill from just a few injection packers.
The distance of the drilled holes to each other usually varies from approximately 6 to 20 inches according to the width of the crack. (Rule of thumb: 1 foot) The wider the crack, the further apart are the drill holes. Experience helps in deciding how far apart to drill the injection holes.
If the concrete thickness is 6 inches or less, do not attempt angle drilling, set the packers straight into the face of the crack. This will help to minimize spalling in these concrete sections.
STEP 3 – INSERT INJECTION PACKERS
Place packers in the previously drilled hole, so that the top of the rubber sleeve is below the concrete surface. If the packer can’t be pushed into the hole, tap it in. Tighten the packer with a wrench as tight as necessary. For critical areas such as corners and badly deteriorated surfaces, SealBoss Corp. supplies long versions of the regular packers to allow a deep insertion of the expandable rubber sleeve.
STEP 4 – FLUSH CRACK IF NECESSARY
In some circumstances, it can be very useful to flush the crack with water to improve the subsequent penetration of the injection resin into thicker walls. Flushing helps to detect blind drill holes, or lost continuity of a crack. The procedure starts at the lowest packer on a vertical crack, or at the narrowest part of a crack of a horizontal surface and proceeds from packer to packer in sequence. During flushing, it is advisable to disconnect zerk fittings from packers that are not connected to the pressure line and thereby creating an exit for surplus liquid. After completion of flushing, prepare for the resin injection. Flushing is not advisable for epoxy injection.
STEP 5 – CRACK INJECTION
When all preparation work is completed, make sure the injection pump is in good working order. All equipment that comes in contact with the chemicals must be absolutely dry. Always remember that polyurethanes are water reactive. This will save a lot of valuable time on the job. Choose the proper resin for the correct application. The nature of the crack/joint and the conditions at the job site determine the choice of material.
Active water flow at a high rate is best stopped by using SealBoss 1510 Water-Stop Foam. Moving cracks and expansion joints should be injected with SealBoss 1570 Flexible Water-Stop. Hairline cracks and dry cracks can be sealed using 1400 LV-Resin Line. Some problems are solved by using a combination of products. A major water leak through an expansion joint for example, can be initially stopped with 1510 Water Stop. To achieve flexibility, SealBoss 1400 Line Lv-Resin or 1570 Flexible Water-Stop can be injected right afterwards. Please consult the product catalog, observe data sheets for details, and don’t hesitate to call for technical support. We want you to do the job right.
Mix resins in accordance to specifications and recommendations. Load the resin hopper and charge the pump, hose, and gun. Open the valve on the gun, and allow all remaining solvent to pass while watching for the resin to appear. Catch all surplus material and solvent in a waste container and please observe state and federal regulations. Keep the hopper covered in wet environments, especially if it is raining or water is dripping from the ceiling in an enclosed environment.
The technician should be carefully watching three points of reference:
1. The crack /packer- for resin flowing out of the work face
2. The pressure line – for pump pulsations indicating resin flow
3. The gauge (if available) – for actual injection pressure applied
Begin the injection at the point of highest resistance to ensure good penetration and minimal loss of chemical. This is usually the lowest point on a vertical crack and the narrowest area on a horizontal surface. First, fill the drill hole, then start slowly injecting the crack.
Holding the pressure line allows the operator to feel the pump pulsations. The technician may tell from the hose vibration how well the material is flowing into the crack. If a pressure gauge is available, the pressure should be monitored and kept in a range that is just enough to allow sufficient flow of material. This procedure helps to minimize unforeseen events like sudden spills of material, blown out ports or spalling of defective concrete. If the crack surface exhibits immediate free flow of resin while working the first packer, pause for a few minutes. In most cases the foam (1510 or 1570) will react fast enough with the water and expand rapidly. The resulting resin product will heal the crack and provide a surface seal to contain the material to follow. After approximately three to five minutes start pumping again.
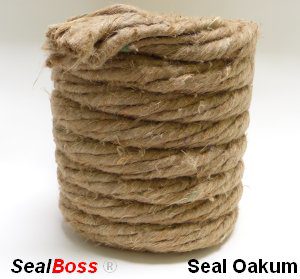
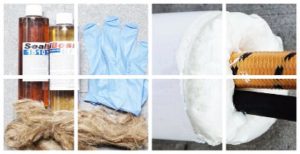
If the resin continuous to flow freely out of the crack , stop pumping and apply a surface seal over the crack with rapid setting cement or place absorbent materials such as oakum or foam rubber soaked in the reactive grout until saturated. Use a screwdriver or similar to jam the soaked material into place and allow a few minutes to cure and pump again. When the soaked material comes in contact with water it starts to expand, creating a fast, permanent surface seal. Resin may still flow from pinholes in the patch, but do not be concerned as long as the majority of the resin is contained. A small amount of leakage is beneficial because it shows the extent of resin travel.
Extremely wide cracks should be covered with a surface seal prior to injection in order to contain the resin until cured. Under proper pumping conditions in active leak injection, the following signs should be observed in the order listed:
1. Water displaced from the crack by the resin
2. Water and resin mix (foamy) appearing at the crack (1510 and 1570)
3. Pure resin from the crack
It is helpful to disconnect the zerk fitting from the packers ‘ahead’ to allow free port to port travel. Proceed pumping until the resin has travelled to the next packer, and is oozing out slowly on the visible side of the crack. Once you are assured that the resin has reached the next injection packer, attach the zerk fitting. Shut-off resin flow, disconnect your pressure line and proceed to the next packer. After injecting a couple packers, return to the first packer and inject again. Some of the packers will take more grout, filling up more of the crack and creating a higher density crack filler. Some contractors reinject up to three times. Continue in this fashion until the crack is completely filled.
Occasionally applicators object to the loss of some resin from the crack as an unnecessary expense. Remember, however, that a little resin lost is a good insurance that the crack is well filled and a job is well done.
STEP 6 – CLEAN UP
Once the injection work is completed, a good and thorough cleanup is essential, because once the resin hardens, it is almost impossible to dissolve it. Any resin spilled must be cleaned immediately before the resin sets. Clean your injection pump, mixers and any other tools that came in contact with the product thoroughly using SealBoss R70 Cleaner / Pump Flush or a solvent. Please observe data sheets for details and warnings. A good thorough cleanup is time well spent, and will save you a lot of grief on your next project. The packers can usually be removed within 24 hours and the holes should be patched. If desired, an electric grinder can be used to remove excess cured grout that flowed out the crack.
3 SEALING EXPANSION JOINTS AND WIDE CRACKS
SealBoss 1570 Flexible Water-Stop-Foam is an excellent repair material for leaking expansion joints, wide cold joints, and extra wide moving cracks. 1570 is also very successful for repairing failed water stops. In the past, repairing joints was difficult, because an expansion joint is designed to move.Some products for stopping water are rigid and hard setting; such materials either break up and fall out over time, or they bond solidly and prevent the designed movement within the joint – thereby defeating its purpose and crating new cracks. Most flexible sealants on the other hand, require a clean, dry surface (or special surface preparation) to obtain a bond. These materials do stretch, but often fail to adhere, because of imperfect conditions during their installation. Expansion joint repair with the flexible closed cell grout 1570 takes full advantage of its ability to expand in confined spaces. The expansion of the reacting material allows the seal to stay in compression, rather than tension, therefore preventing bond failures.While injecting SealBoss 1570, the concrete surfaces of the joint provide confinement on two sides. The outer confinement can be soil or a water stop. Confinement on the inner surface can be installed temporarily by a backer rod and hydraulic cement.
Another method has been proven to be effective in very active leaks: strips of untreated oakum, foam rubber or other absorbent materials may be soaked in resin and packed into the joint recess. Such resin soaked strips are called expanding gaskets, the process is called Expanding Gasket Placement. The foam cures rapidly, thus forming a quick molded-in-place gasket seal. This inner surface, if desired, may be removed after injection.
If a leak flows are at a very high rate, one or more pieces of small diameter pipe may be imbedded in the packing material. These diversion pipes serve to relieve pressure and divert flow while the packing seal solidifies. Once the seal has cured, a small amount of resin injected through the pipes will rapidly complete the seal. The pipe can then be removed.
The following steps in sequence are recommended for a successful application.
1. Remove debris from joint surface
2. Remove old or failed sealant
3. Drill injection holes and install packers
4. Flush injection holes and joints
5. Apply joint seal backing if required
6. Inject SealBoss 1570 Flexible Water-Stop foam
7. Cleanup
STEP 1 – REMOVE DEBRIS FORM JOINT SURFACE
Clean away surface deposits and debris just as described for crack sealing work. With the smallest amount of extra effort, the end result will be the most effective seal possible, and the best-looking as well.
STEP 2 – REMOVE OLD OR FAILED SEALANT
Old cement patches in expansion joints defeat the purpose of the joint. Complete removal, however, is usually difficult and may not be practical. All loose mortar, at least, should be removed, to allow enough room in the joint for the SealBoss 1570 foam to be placed in sufficient quantity. Expansion joints are designed to move. At 50% elongation, 0.10″ can become 0.15″ while 1/2 can become 3/4″. If a water stop is present, and its depth is less than eight inches, remove everything down to it.
STEP 3 – DRILL INJECTION HOLES AND INSTALL PACKERS
Injection holes for expansion joints should be drilled in the same manner as for a crack. However, if a water stop is present in a depth of more than eight inches, best results are usually obtained by incorporating whatever is left of it into the new seal. Thus, injection packers should not pierce the water stop if full-depth penetration is not required; each hole should be angled to end just short of the water stop material.
STEP 4 – FLUSH INJECTION HOLES AND JOINTS
Joint flush procedures are the same as outlined previously for cracks.
STEP 5 – APPLY JOINT SEAL BACKING, INNER JOINT SEAL
Large volumes or heavy flows of water must be controlled during resin injection and cure. There are several materials and methods of control from which to choose. Some of the common choices are as follows:
1. Backer Rod
2. Hydraulic Cement
3. Expansion Gaskets (E.G.P.), Absorbent Materials – Chemical
4. Diversion Pipes
STEP 6 – 1570 Flexible Water-Stop-Foam INJECTION
The procedure for resin injection in expansion joints is similar to the procedure outlined for crack sealing. However, any pressures much above the minimum required to open injection packer valves, will rarely be needed. In fact, special care should be taken so as not to rupture the outer seal. Begin injection at the lowest packer, and work your way up. Best results are obtained by methodically proceeding to the end of the joint without unnecessary interruptions. Continuity helps to assure uniform density and continuity of SealBoss 1570 Foam. Continue to pump each packer, until resin flows from the packer ahead, before moving up. When the last packer has been pumped, go back to the first packer, and work through the series again, adding a small amount of resin at each. Watch your outer seal carefully. After curing overnight, the expansion joint is sealed and is ready for a long life of reliable service.
STEP 7 – CLEANUPAs outlined previously in crack injection procedures.
IV SAFETY INFORMATION
Please be safety and health conscious!Technical data sheets, MSDS and container labels must be read and understood before working with the products. Good ventilation must always be maintained when handling resins and solvents especially in confined spaces. Working with high pressures also creates certain risks. Loose injection packers have been known to slip out of holes. Face shields, rubber gloves and coveralls have to be worn at all times while working with construction chemicals. Cured material is extremely resistant to chemicals and most solvents. Stains on clothing can usually not be removed.
V – Limited Warranty Policy and Disclaimer for Products Supplied, Produced and/or Distributed by SealBoss Corp.:
All recommendations, statements and technical data herein are based on tests we believe to be reliable and correct, but accuracy and completeness of said tests are not guaranteed and are not to be construed as a warranty either expressed or implied. User shall rely on his or her own information and tests to determine suitability of the product for the intended use and user assumes all risk and liability resulting from his or her use of the product. Nothing contained in any supplied materials relieves the user of the obligation to read and follow the warnings and instruction for each product as set forth in the current Technical Data Sheet, product label and Material Safety Data Sheet prior to product use. SealBoss Corp. warrants supplied / distributed products to be free of manufacturing defects. Seller’s and manufacturer’s sole responsibility shall be to replace that portion of the product of the manufacturer which proves to be defective. There are no other warranties by SealBoss Corp. of any nature whatsoever expressed or implied, including any warranty of merchantability or fitness for a particular purpose in connection with this product. SealBoss Corp. shall not be liable for damages of any sort, including remote or consequential damages resulting from any claimed breach of any warranty whether expressed or implied. SealBoss Corp. shall not be responsible for use of this product in a manner to infringe on any patent or any other intellectual property rights held by others. In addition, no warranty or guarantee is being issued with respect to appearance, color, fading, chalking, staining, shrinkage, peeling, UV damage, excessive temperature exposure, normal wear and tear or improper application by the applicator. Damage caused by abuse, neglect and lack of proper maintenance, acts of nature and / or physical movement of the substrate or structural defects are also excluded from the limited warranty. SealBoss Corp. reserves the right to conduct performance tests on any material claimed to be defective prior to any repairs by owner, general contractor, or applicator. Neither seller nor manufacturer shall be liable to the buyer or any third person for any injury, loss or damage directly or indirectly resulting from use of or inability to use the product. Recommendations and statements other than those contained in a written agreement signed by an officer of the manufacturer shall not be binding upon the manufacturer or seller. SealBoss Corp. reserves the right to change the properties of products without notice.


